
A small example Rest client with Jersey.
The full code and project can be found on GitHub
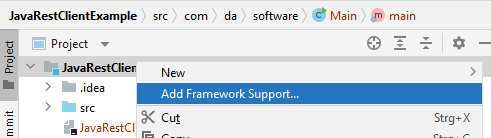
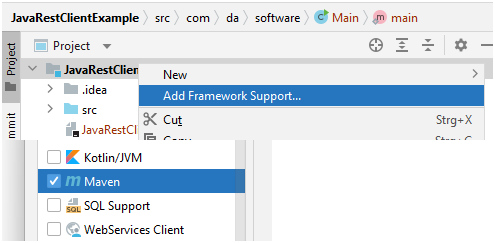
Create a project and add Maven support
We create a normal Java command line project in IntelliJ. After the creation, we add support for Maven.
Select Maven from the list.
This will create the „pom.xml“ file where we can add our dependency for Jersey by using the context menu in the file and click on „Generate“.
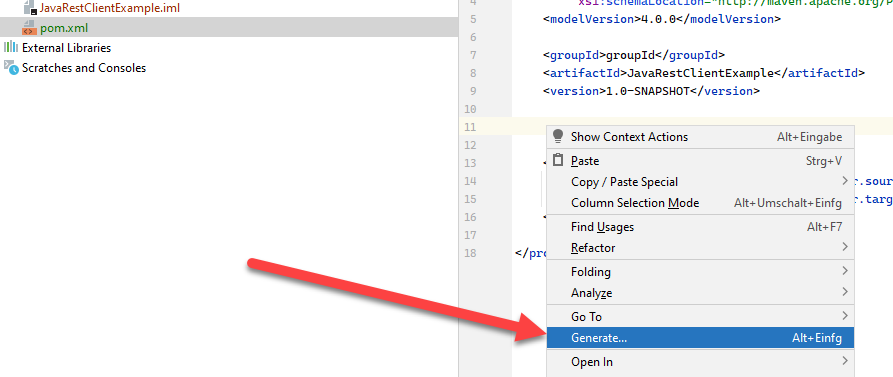
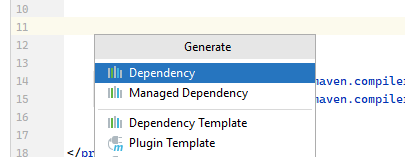
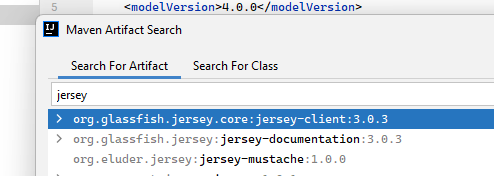
Add Jersey client with Maven
Click on „Dedendency“ in the menu that appears.
This will open the search. Search for „jersey“ which will bring up „org.glassfish.jersey.core“.
This will add the following code to the pom.xml. You have to refresh the Maven project now.
<dependencies>
	<dependency>
		<groupId>org.glassfish.jersey.core</groupId>
		<artifactId>jersey-client</artifactId>
		<version>3.0.3</version>
	</dependency>
</dependencies>
Implementation
Now we can start with the implementation. We will request cat facts from an open Rest apiu. The following function creates the Rest client.
private static Client createClient() throws NoSuchAlgorithmException, KeyManagementException {
	TrustManager[] trustManager = new X509TrustManager[] { new X509TrustManager() {

		@Override
		public X509Certificate[] getAcceptedIssuers() {
			return null;
		}

		@Override
		public void checkClientTrusted(X509Certificate[] certs, String authType) {

		}

		@Override
		public void checkServerTrusted(X509Certificate[] certs, String authType) {

		}
	}};

	SSLContext sslContext = null;
	sslContext = SSLContext.getInstance("SSL");
	sslContext.init(null, trustManager, null);

	var client = ClientBuilder.newBuilder().sslContext(sslContext).build();
	return client;
}
Most of the code handles SSL issues, we will basically ignore SSL certificate errors here. This might not be needed or desired depending on your endpoint.
Now we can create the client and make a request. We will do that in the „main“ function.
public static void main(String[] args) {
	var url = "https://catfact.ninja/fact";
	try {
		var client = createClient();

		var resp = client.target(url).request().get();
		resp.bufferEntity();
		var result = resp.readEntity(String.class);
		System.out.println(result);

	} catch (NoSuchAlgorithmException e) {
		e.printStackTrace();
	} catch (KeyManagementException e) {
		e.printStackTrace();
	}
}
With our client we do the request and then get the result as String and output it.
Problems and adding more packages
However I ran into a few problems here. Mostly missing dependencies. However these can be easily fixed with Maven.
The first one was the „InjectionManagerFactory“ missing.
Exception in thread "main" java.lang.IllegalStateException: InjectionManagerFactory not found.
This was fixed by adding the following dependency to the „pom.xml“.
<dependency>
	<groupId>org.glassfish.jersey.inject</groupId>
	<artifactId>jersey-hk2</artifactId>
	<version>3.0.3</version>
</dependency>
After that the project worked and I got the cat facts from the server, however, there was still a warning.
WARNING: A class jakarta.activation.DataSource for a default provider MessageBodyWriterwas not found. The provider is not available.
Yet another dependency fixed the issue.
<dependency>
	<groupId>jakarta.activation</groupId>
	<artifactId>jakarta.activation-api</artifactId>
	<version>2.0.1</version>
</dependency>
Finally!
Now it worked without error, outputting the cat facts. Meow!

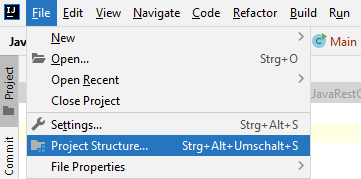
Creating a JAR file
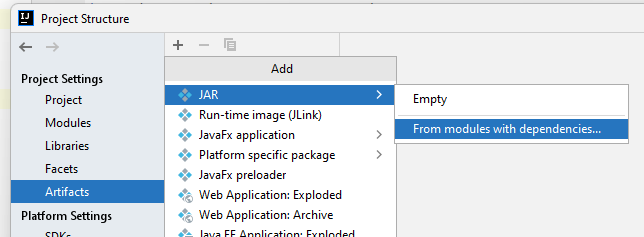
The last step is to create a JAR file, which can be run, for example, from the command line. For the project to create a JAR file, we have to edit the „Project Structure“.
Here we can add a JAR in the „Artifacts“ section. Select „From modules with dependencies“.
We have to select the „Main“ class for startup.
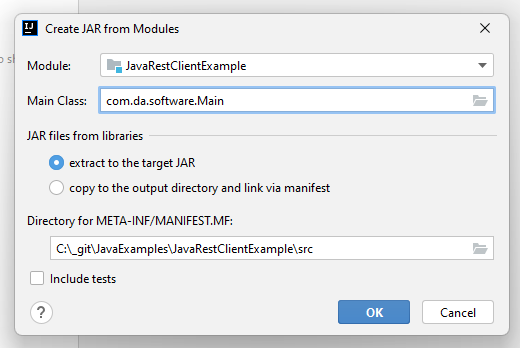
The JAR file can be build from the „Build“ menu – „Build Artifacts“. This will put the JAR file in the „out“ folder of the project.

Running the JAR file from command line
The JAR file can be run from the command line.
java -jar JavaRestClientExample.jar

And thats it!