Dies ist die englische Version, wer die Reparaturanleitung auf Deutsch lesen möchte, hier klicken.
Since I got a lot of feedback for my repair guide for the Roomba
I am a happy owner of a Roomba 580 device for almost 3 years now. However some time ago my Roomba stopped working. Turned out to the "error 9 problem". The Roomba just moves turns around in circles and ends up with and 9 beep error code.
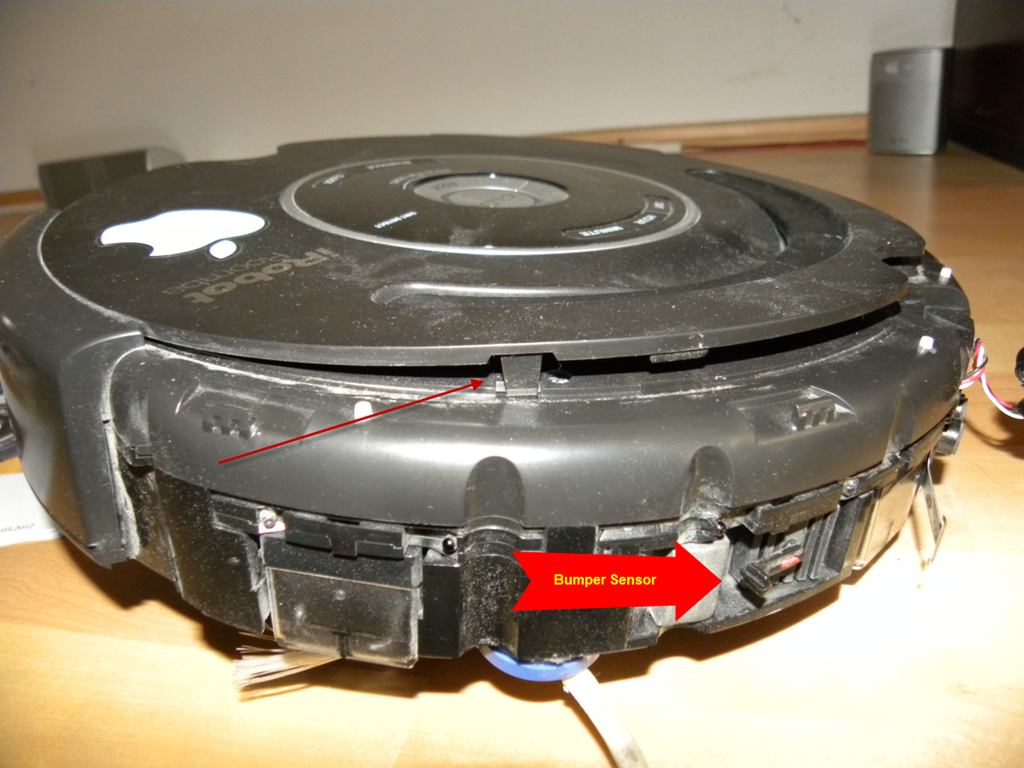
After some investigation on the Internet it turned out that the problem is related to the bumper sensor. The bumper is the big black thing on the Roomba’s front. It detects hits to the wall. This results in a Roomba thinking constantly hitting a wall and acting stupid.
The good news is, this can easily (and also cheap) be fixed by replacing some components with a soldering gun.
Note: this guide is for a Roomba 580 device, but should be the same for all 5xx models.
Let’s start! In the first step we find out which of the two bumper sensors is causing the problem. iRobot reckons on their website, that something may mechanical block the sensor. So in the first step, try to push the bumper a few times in order to remove any obstacles. However in most cases the sensors are just not working
To find out which sensor is not working, we have to activate the Roomba’s diagnostic mode:
-
turn of the Roomba, the CLEAN LED must of off
-
now press DOCK and CLEAN together and hold them
-
press the SPOT button 6 times
-
now release DOCK and CLEAN
-
the Roomba should play some melody and is now in the test-0 mode, also the LEDs are blinking
-
press the DOCK button 2 times to go to the bumber test (test-2)
-
the Dirt detect LED should be blinking now and the CLEAN LED should turn red
-
now we can test the bumbers, if we push the bumper right, the the DOCK LED should turn on until the bumper is released, if the LED is not turning on the right sensor is broken. The left bumper turns on the SPOT LED. If one of the LED’s is constantly on, the sensor is broken too.
-
Press DOCK and SPOT for 10 seconds to leave the diagnostic mode
Now that we know which sensor is broken, we can disassemble the Roomba.
For the repair the following parts are needed:
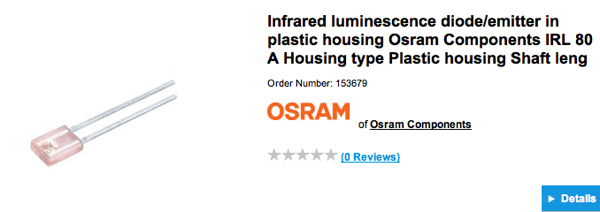
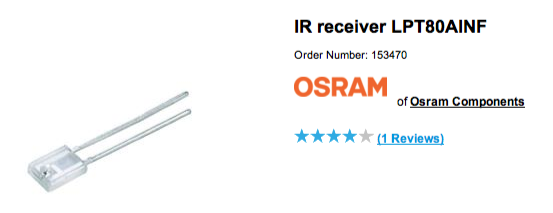
These can be orderd at Conrad (the order numbers here are from Conrad). The price is around 1 Euro each item. For every sensor on of each diodes is needed. I reckon to order some spare ones too, just in case if something goes wrong, or like in my case, the other sensor broke some month later.
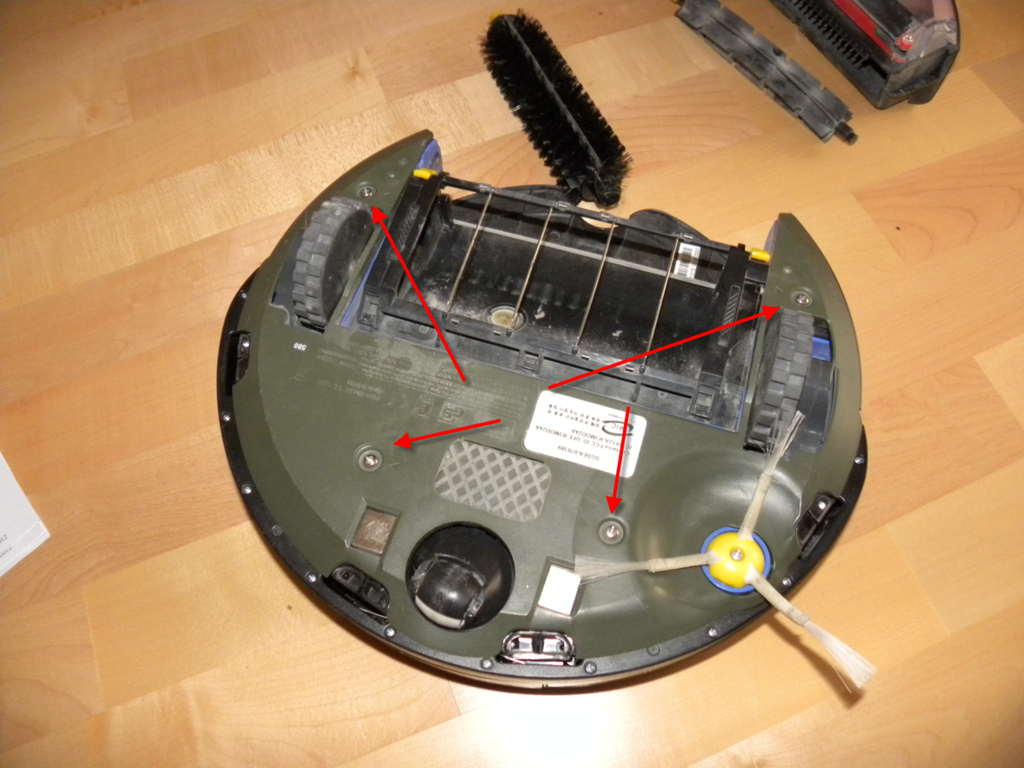
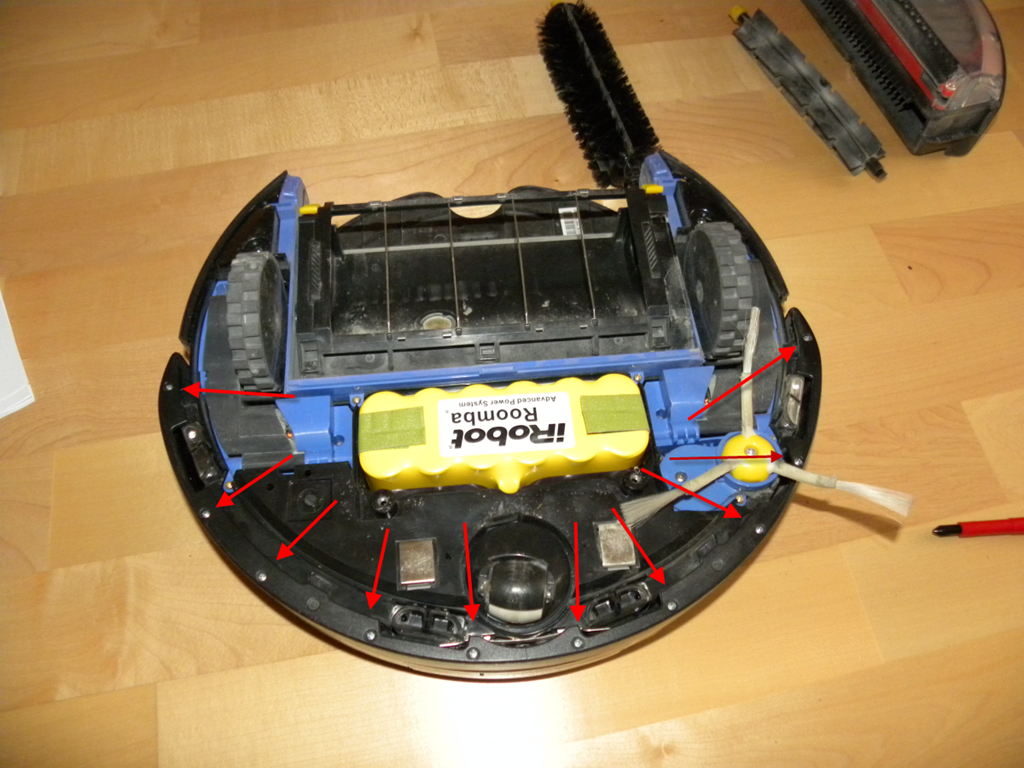
Now we have to disassemble the Roomba. I suggest that you put the screws from each step in a labelled box.
First remove the dirt box and the brushes. Now remove the plate on the bottom:
Now remove the battery
To remove the bumper completly we have the remove the sensor for the base station on the top:

Having removed the bumper, we can now see the bumper switches. Check if they can be pushed without problem. Of not there might be a mechanical problem.
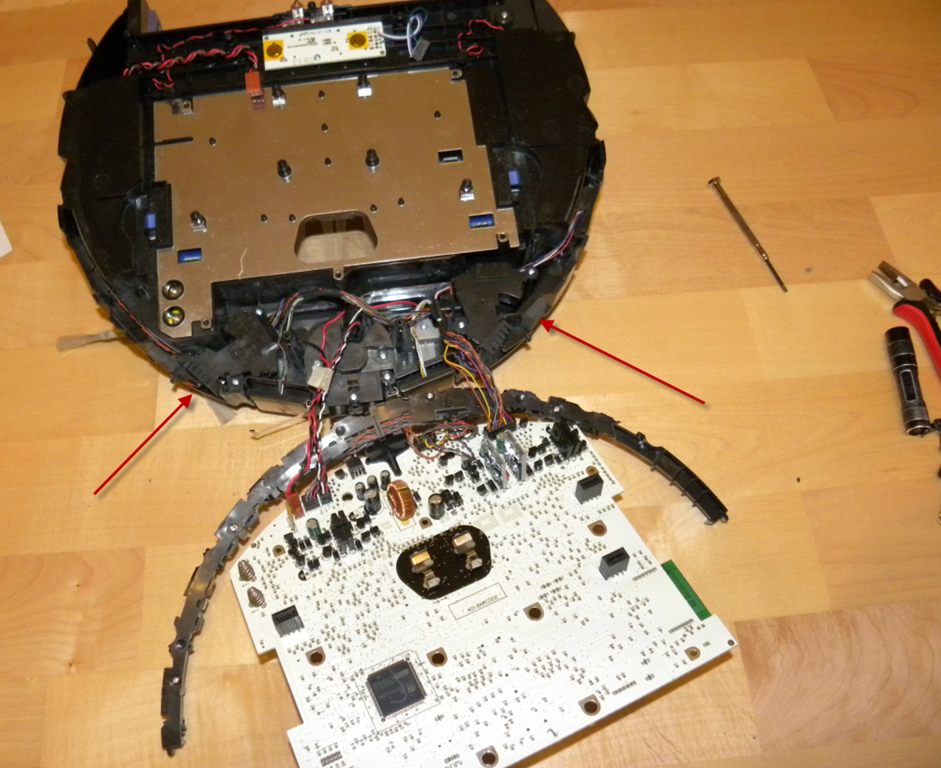
Now remove the upper plating. These plate is relativly hard to remove. Use "careful force" to remove it:
In the next step we have to remove a lot of screws. Note that one is slightly smaller than the others.

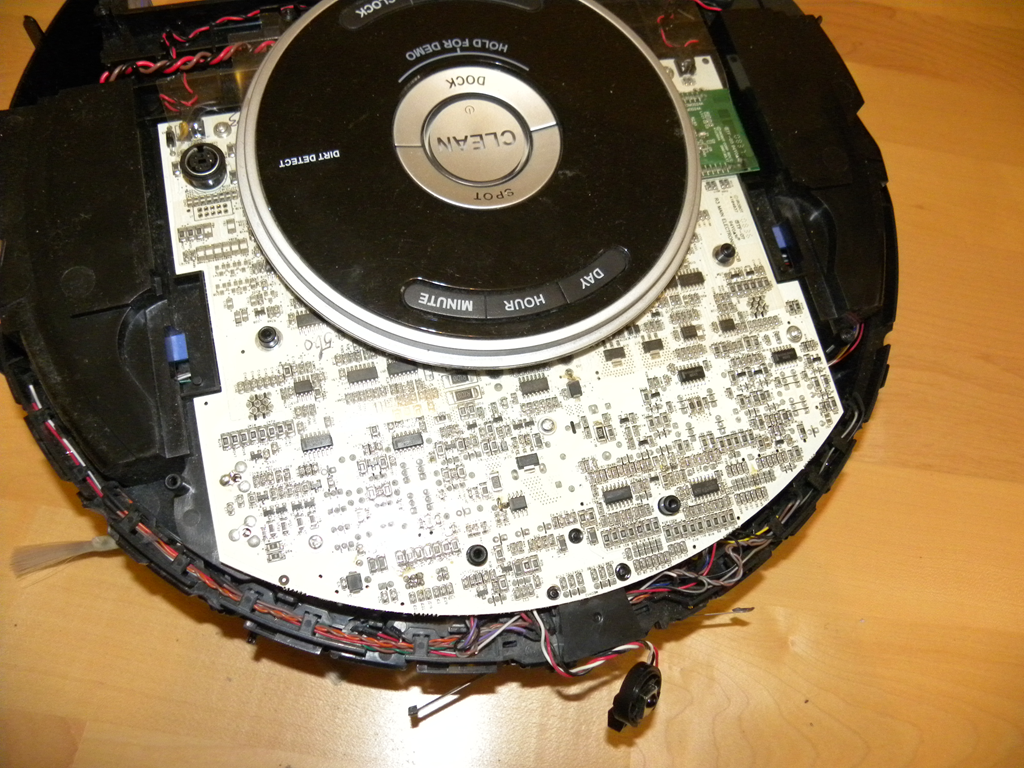
Now we can see the circuit board. Remove the grey ring in the middle.
You may not be surprised, even more screws to remove:

Remove the cable connector from the circuit board:
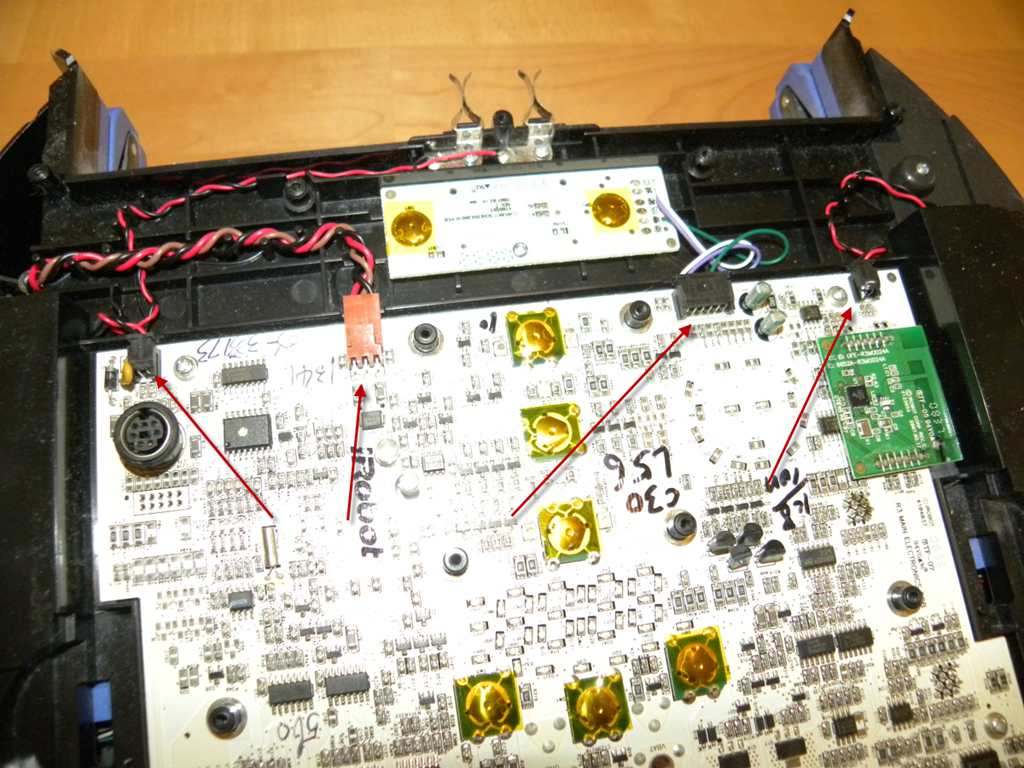
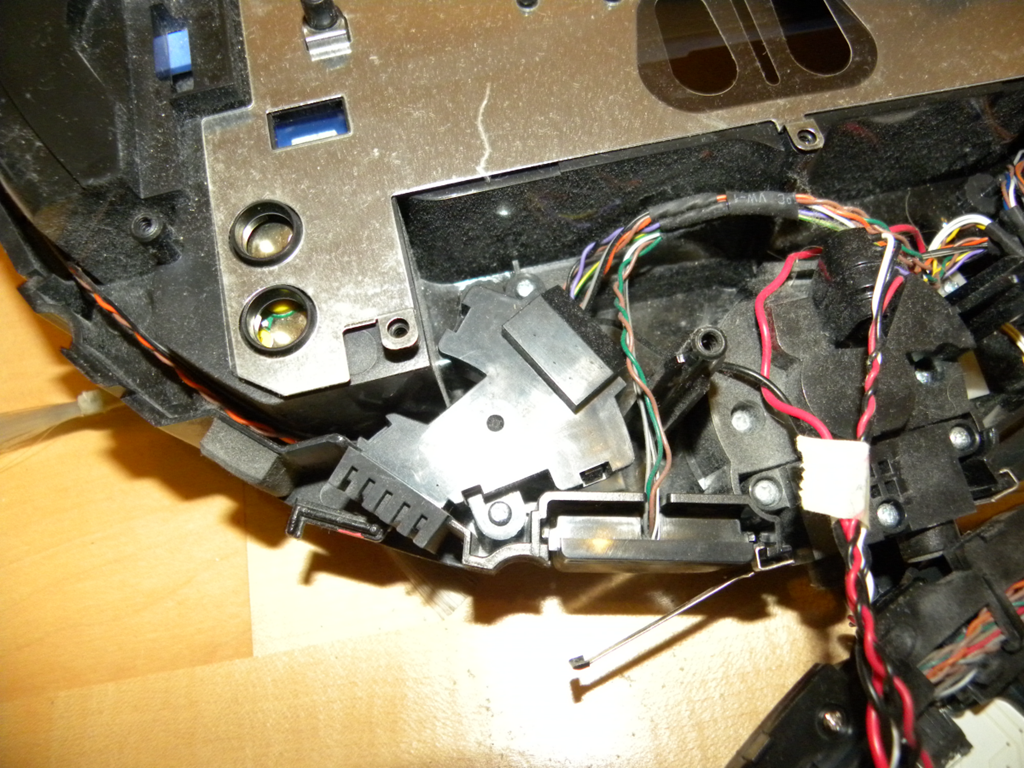
Carefully flip over the circuit board, after that we can already see the bumper sensors:
These are fixed with two screws. We remove these now. Now we have to disassemble the sensor. We need to be very careful here not to break anything of the plastic housing. Inside is a small spring which easily might get lost. We don’t want this to happen.
Inside you find a small PCB with the two diodes:
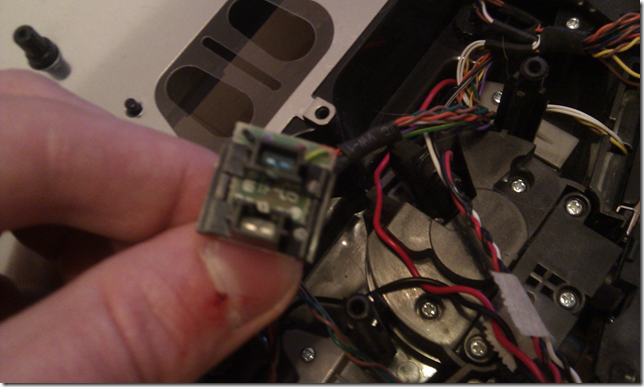
Now grab your soldering gun and replace the two components:

The IR receiver it the "upper" one with the slight blue color.
Well thats it. Now reassemble the Roomba and hopefully everthing should be working again. Check the function of the sensors by using the diagnostic program.
I reckon to do the testing before completly reassembling the Roomba.
Good luck!