Recently I switched my netbook to Linux in the hope that it will run like this for a few more years. Shortly after I threw it down and the display broke. What to do? Sure, buy the display as a spare part and change it.
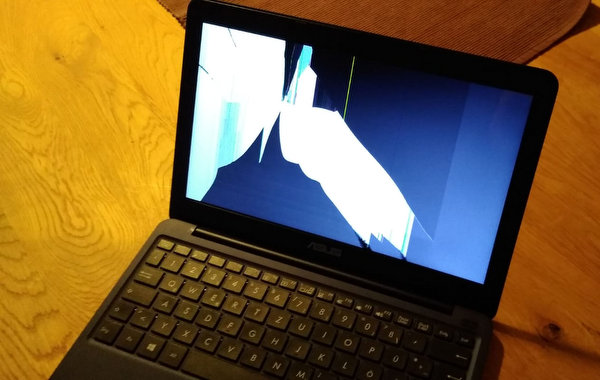
Not paying attention for a moment, the netbook dashed from the sofa to the floor. After that the display only showed the following:
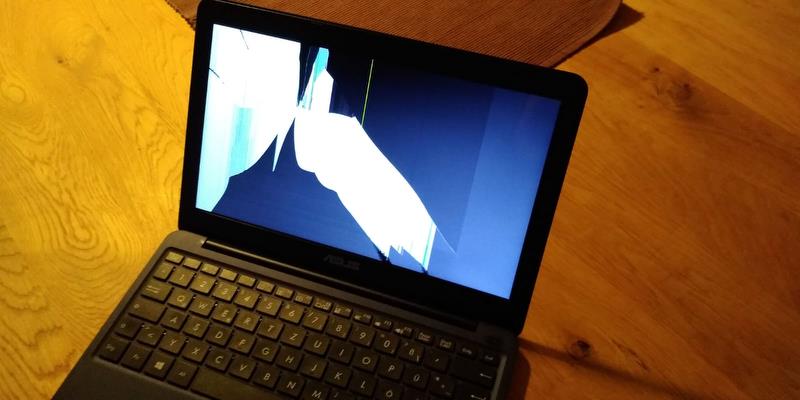
At first I thought that this was a creative Linux screensaver. Such screensavers exist! Unfortunately this was not the case. The fall was unfavorable and the display was broken. What to do?
Although the netbook was a very cheap device and the loss was limited, it was annoying because I like to use the device. It’s light, small and perfect as a small portable typewriter for blog posts like this one. By the way, the article is created on the netbook again. 🙂
After already looking for a successor, I thought, why not look for a spare part. I found it on eBay. A new display for almost 44 Euro including shipping. Is it worth it? Good question, I paid only 150 Euro for the netbook 3 years ago. And there is always the risk that the repair will fail.
Nevertheless I wanted to repair the netbook now. So here are the instructions, in text form and as video.
Dismantling the display
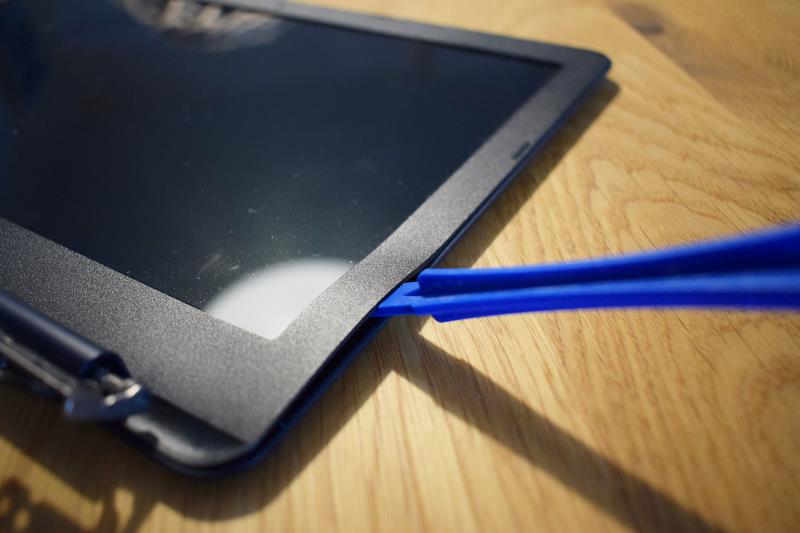
Removing the display is relatively easy. A Phillips screwdriver and a spatula or other flat tool is required. First the base plate is loosened. This is held with a few screws.

When the screws are loosened, the base plate can be snapped out with the spatula. This is not very firmly hooked in.
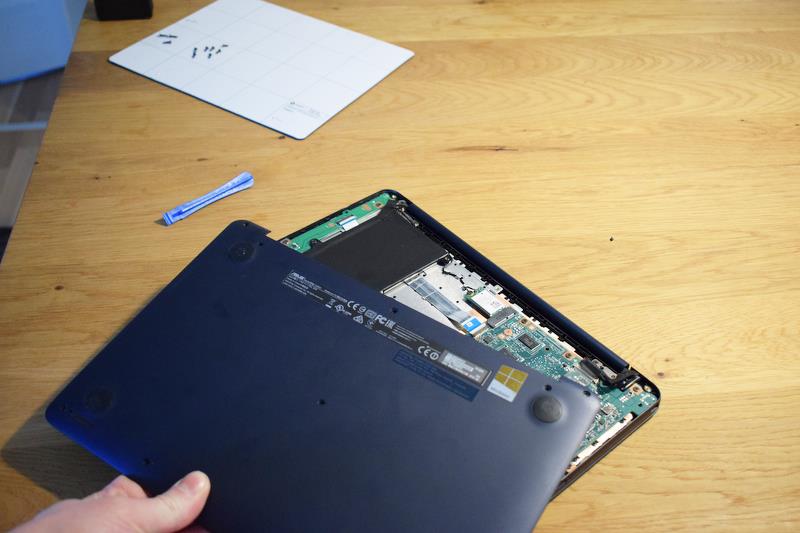
There are three longer screws, so you should document something that belongs where.
When the base plate is removed, you can see what’s inside. Not that much. The motherboard is not very big. The battery takes up a lot of space. This is the reason for the long battery life. On this occasion, the question is also answered whether RAM or the hard disk can be expanded: No!
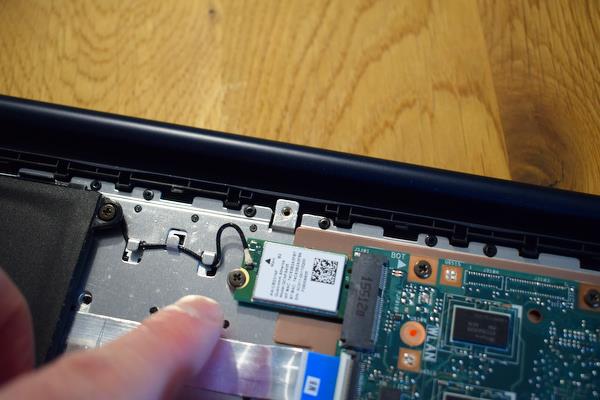
Two cables lead to the display itself:

One is the signal and power cable for the display itself. The second is the antenna cable that connects the antenna in the display to the WLAN card. Both have to be solved now.

The display cable is fixed with adhesive tape, it is easily inserted into the plug and can be loosened with gentle force. The WIFI cable is only plugged in and can be easily pulled out upwards.
The display itself or the hinge is held in place with 4 screws. These we now loosen. Then the display is separated from the rest.

Now comes the tricky part. Screws are easy to loosen and also to reattach. When disassembling the display it gets more difficult. The upper cover is fixed with snap fasteners. This can be released carefully with the spatula. Here should release piece by piece.
The upper part is still easy to remove, the lower part was partly fixed with glue. In addition the „bulge“ at the lower end is disturbing here. This can also be removed with the spatula. I did not manage to do it completely non-destructively. Unfortunately a few plastic noses have also come loose.


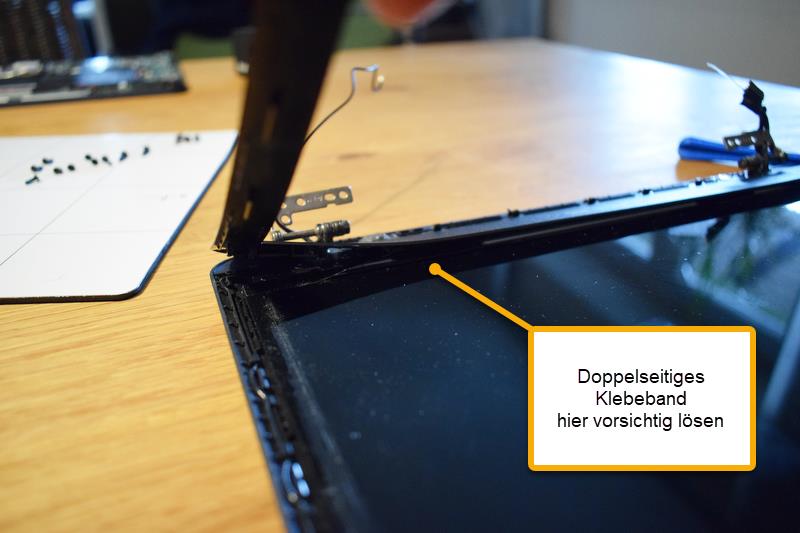
If the display cover is removed, the display can be loosened with 4 small screws.

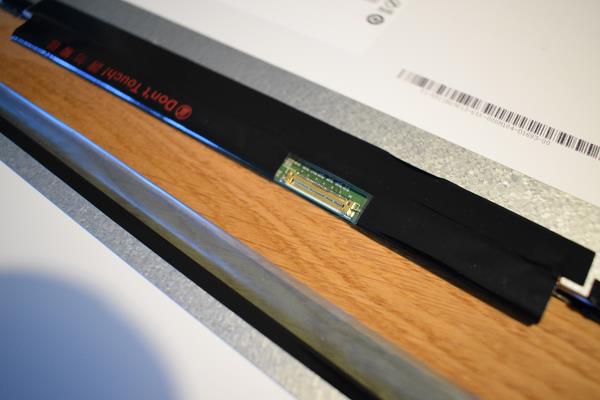
It can then be carefully removed. The display cable can now be removed. Same procedure as on the mainboard.

That’s it, the display is out!
The correct display
Now it was necessary to find the right display. On the back you can find a type number. Unfortunately you can’t find a suitable display on the internet or only abroad for more money. So I searched on eBay for „Display Asus E200HA“. Here you can find some displays, but some of them seem to be not compatible.
What should one pay attention to? The connection, for one thing. This should have the correct number of pins and width. In addition one should pay attention to the position of the fasteners in the pictures. Here there were some on the sides, in my case they were on top and bottom.
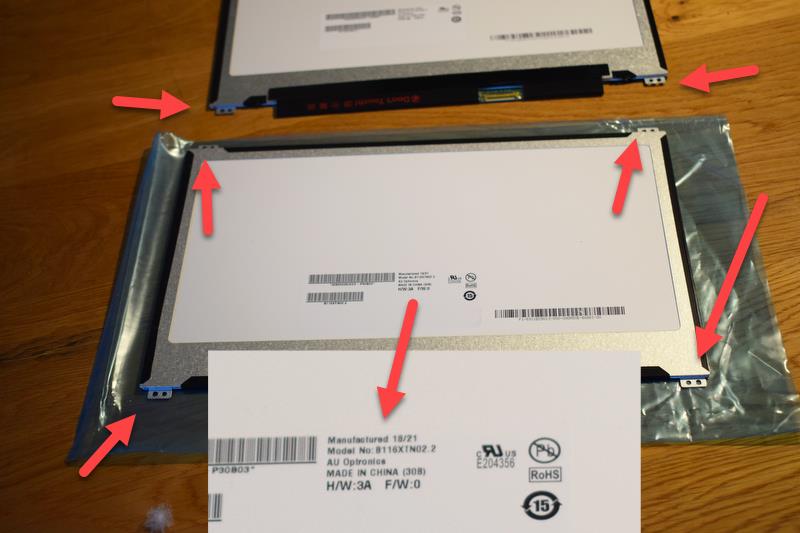
In the end, the display cost 43 euros, including shipping. 50 Euro was also my pain threshold. The display arrived and then had the same model number on the back. Perfect. Then the assembly could start.
installation of the display
In the end, the installation is exactly backwards! Who would have thought that. First the display is connected with the display cable. The plug should snap in noticeably, then we fix the cable again with the adhesive tape. Now we can carefully fold and insert the display without loosening the cable again.
We can now fix the display again with the four screws. If present, we now remove the protective foil on the display. Afterwards we put the cover back on and clip it on. Afterwards we put the bead back on. Make sure that the cables run inside. Unfortunately I didn’t pay attention to this and so the WLAN cable went down on the outside of the case. So take it apart again and repair it.
Despite a few broken plastic noses everything still holds here with me.
When this is done, the display is connected to the lower part again. First we screw on the hinge. Fortunately, the places where the screws belong are marked with an arrow. If both are firmly connected, the display cable can now be connected. The cable should snap into place and then be fixed with tape.

The WLAN cable is now plugged in and threaded again.

Before we screw the bottom cover on, we can do a test run. Does the display even run? Second test, does the WLAN work?

If both are running, the base plate can also be screwed back on. Done!

sumething
Basically the repair is not difficult, the spare part does not cost the world. Annoying are a few broken plastic noses and a small gap in the display cover. But the alternative would have been the recycling center for the device. So it goes again and it shows that you should always check if you can find the right spare part before disposing of it.
Environment and wallet thank you. I would have bought something cheap again, but a new purchase would have cost a little more money. 🙂
For all who have the same problem: Good luck!
Translated with www.DeepL.com/Translator (free version)