Introduction
In this document I want to describe some ideas how branding of an Eclipse RCP application can be implemenented. Since I never done this before, there might be better ways to do that, so feel free to contact me.
Its not a walk through how to do these things step by step, its more an example how certain things could be done. The complete source code is available for download at the end.
Was is branding?
First lets discuss what we want to achieve and what branding means in this context. Imagine a situation where we want to ship our software in multiple versions, with different names for the software, different images shown in the GUI, different reports, template files, icons etc.
We have a single source code and want to implement two versions of our product:


Catastic
In my example we want to ship two versions of our cat mail software. Its based on the Eclipse mail application sample. We want to have two versions of that Software: "Catastic" and "FatCat". Each version should have its own splash screen, Icons, About dialog, custom file templates and also certain strings are different in the UI.
Our goal is to achieve that with minimum impact on our source code. Lets get started!
Plugins
Lets start with the plugins:
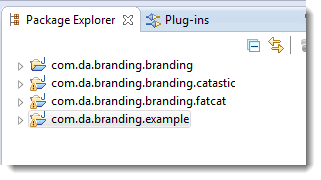
The application code resides in "com.da.branding.example". In addition we create 3 more plugins, one generic branding plugin, which is the "gateway" to the specific branding plugins. If we look at the dependencies, we can see, that our application only depends on the branding plugin:

This allows us to add new brandings, as well as removing brandings, without having our main application depending on a specific branding. The main branding plugin contains the branding logic, the specific plugins mostly contain the spefific branding information, like images, texts etc:

Branding
OK lets brand the software. There are certain tasks that can be achieved easily by the RCP framework and product configurations. Other functionality must be implemented in code. Lets start what we can do with the product configuration.
Product
A lot of stuff can be done in the product configuration, like splash, about and icons. So we create a product configuration for each output software. The first step is to create an extension point for the products in the specific branding plugins:
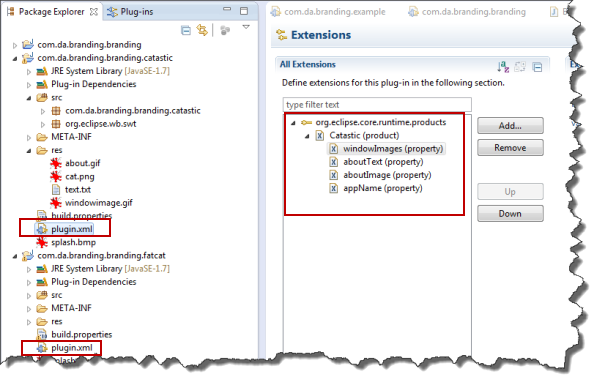
As you can see, there is also a specific splash screen in each plugin.
In the extension point we can define several things for each branded version, the about text, about image, the application name and the icon which appears in the title bar of the application. The extension point is used by the actual product configuration.
For each extension point I created a product configuration for the specific branded applications:
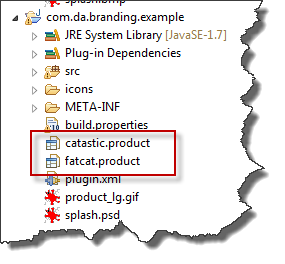
Selecting the correct product picks of the settings from the extension points and adds them to the product configuration.
The other configuration of the product configuration is straight forward. The important thing is to set the correct settings for the product definition:
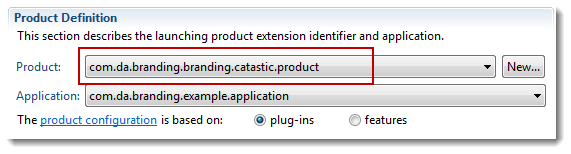
All other things like the splash screen image and the icons are configured as normal.

When we launch each product configuration, the correct splash screen should be shown, as well as a different application name and a custom about dialog.
However there might be more. The other things we need are implemented in code.
Code
Since now we only changed some visual things. But there might be more, like different templates files, some different logic, whatever.
So we create a class "Branding" in "com.da.branding.branding", which is a singleton and will be responsible for handling branding requests from our main application.
When we create the singleton, we have to check which product configuration we are running:
String product = Platform.getProduct().getId();
We store that information in the Branding object. By that we now can distinguish the current software we are running, for example to display different images, like that:
public Image getImage() {
    return ResourceManager.getPluginImage(_brandingPlugin, "res/cat.png");
}
_brandingPlugin contains the name of the specific branding plugin. We can use the same mechanism for files, strings and other things. Even more complex things like returning a perspective. Goal is to implement the differences for each application here.
In our main source code we just call the branding class where needed:
labelImage.setImage(Branding.getInstance().getImage());

loadFile(Branding.getInstance().getFile());
If we add a new branding, no change in the main applications source code is neccessary.
Notes for the Code
In my example everything is in the single branding class. Depending on the amount of logic you need to implement it might be sensible to move logic to its specific plugins. I also thought to create an extension point for the branding logic. However in my example and for the required functionality, lets keep it simple. 🙂
Application
Here is how our application looks now:

Well, thats it! As said at the beginning, thats not an exact guide how to do this. Depending on the requirements, there are more things to implement or implementation might be different. To see how I did things exactly, have a look to the source code. If there are better ways to do things, well let me know! 🙂
Download
The source code of the sample application can be found here.