
Using the Material Design for WPF I came across the dialogs. I wanted to show different dialogs in a DialoagHost. The first impression is, that only one dialog can be added to each dialog host. But how to show different dialogs.
In my example I want to display two different dialog type. An information message and an error message. The trick to do this, is using two data templates, which define the appearance of each dialog.
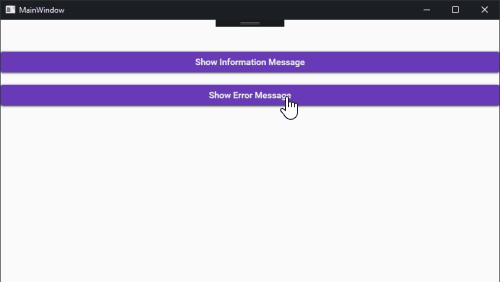
But first lets start with the MainWindow. We define the content of the MainWindow as DialogHost:
<materialDesign:DialogHost Identifier="RootDialog"
                       CloseOnClickAway="True">
The identifier is „RootDialog“. This ID can be used to open a dialog within this DialogRoot.
For the message type we define a common base message type our error and info message share.
public class NotificationMessage
{
    private string _message = "";
    private string _title = "";

    public string Message { get => _message; set => _message = value; }
    public string Title { get => _title; set => _title = value; }
}
From that I just derive two different classes for info and error:
public class ErrorNotificationMessage : NotificationMessage
{
    public ErrorNotificationMessage()
    {
        Title = "Error";
    }
}

public class InfoNotificationMessage : NotificationMessage
{
    public InfoNotificationMessage()
    {
        Title = "Info";
    }
}
So far, so simple. To show a message, I will call the DialogHost.Show method from code behind:
InfoNotificationMessage msg = new InfoNotificationMessage();
msg.Message = "Hello information";

await DialogHost.Show(msg, "RootDialog");
Simple enough! But before this does anything meaningful, we have to define the appearance of the dialog in a data template:
<Window.Resources>
  <ResourceDictionary>
    <!-- Dialog for errors -->
    <DataTemplate DataType="{x:Type model:ErrorNotificationMessage}">
    <StackPanel Margin="20">
      <Grid>
        <Grid.ColumnDefinitions>
        <ColumnDefinition Width="Auto"></ColumnDefinition>
        <ColumnDefinition Width="Auto"></ColumnDefinition>
        </Grid.ColumnDefinitions>
        <materialDesign:PackIcon Kind="Error"
               Height="48"
               Width="48"
               Margin="20, 25, 20, 20"
               Grid.Column="0" />
        <StackPanel Margin="20"
            Grid.Column="1"
            MinWidth="300">
        <TextBlock Text="{Binding Title}"
             Style="{StaticResource MaterialDesignTitleTextBlock}"></TextBlock>
        <TextBlock Text="{Binding Message}"
             Margin="0,20,0,0"></TextBlock>
        </StackPanel>
      </Grid>
      <Button Content="OK"
        Command="{x:Static materialDesign:DialogHost.CloseDialogCommand}"></Button>
    </StackPanel>
    </DataTemplate>

    <!-- Dialog for info -->
    <DataTemplate DataType="{x:Type model:InfoNotificationMessage}">
    <StackPanel Margin="20"
        Grid.Column="1"
        MinWidth="300">
      <TextBlock Text="{Binding Title}"
         Style="{StaticResource MaterialDesignTitleTextBlock}"></TextBlock>
      <TextBlock Text="{Binding Message}"
         Margin="0,10,0,20"></TextBlock>
      <Button Content="OK"
        Command="{x:Static materialDesign:DialogHost.CloseDialogCommand}"></Button>
    </StackPanel>
    </DataTemplate>
  </ResourceDictionary>
</Window.Resources>
We have two data templates, one for the information message and one for the error message. Depending on the object we provide for the Show method, the corresponding dialog will be shown:
ViewModel with Inputs
The first examples showed us, how to show different dialogs with just static text. In the next example, we want to create a new project window.

First, we need to define our Xaml template for the dialog:
<DataTemplate DataType="{x:Type model:NewProjectViewModel}">
	<StackPanel DataContext="{Binding .}"
				MinWidth="200"
				Margin="30">
		<TextBlock Text="Project name:"
				   Style="{StaticResource MaterialDesignTitleTextBlock}"></TextBlock>
		<TextBox Text="{Binding ProjectName, UpdateSourceTrigger=PropertyChanged}"
				 Margin="0,5,0,0"></TextBox>
		<StackPanel Margin="0,10,0,0"
					Orientation="Horizontal"
					VerticalAlignment="Center">
			<Button Content="OK"
					Command="{x:Static materialDesign:DialogHost.CloseDialogCommand}"
					MinWidth="75">
				<Button.CommandParameter>
					<s:Boolean>
						true
					</s:Boolean>
				</Button.CommandParameter>
			</Button>
			<Button Content="Cancel"
					Command="{x:Static materialDesign:DialogHost.CloseDialogCommand}"
					Margin="10,0,0,0"
					MinWidth="75">
				<Button.CommandParameter>
					<s:Boolean>
						false
					</s:Boolean>
				</Button.CommandParameter>
			</Button>
		</StackPanel>
	</StackPanel>
</DataTemplate>
In the dialog, we have one input field for the project name, two buttons for OK and cancel. As you can see we use the standard close commands for the DialogHost. In order to assess which button the user have clicked, we add a boolean CommandParameter. To use boolean in xaml, we need to add the following to our Xaml definition at the top:
xmlns:s="clr-namespace:System;assembly=mscorlib"
We open the dialog, as the others from our code behind.
var viewModel = new NewProjectViewModel();
var res = await DialogHost.Show(viewModel, "RootDialog");

if (res is bool b && b)
{
	MessageBox.Show("New project name: " + viewModel.ProjectName);
}
The result of our dialog can be true, false or null. Null comes back in the case if the user dismisses the dialog by clicking somewhere else. Depending on the „CloseOnClickAway“ property of the dialog host.
Our dialog uses its own ViewModel, which looks like that:
public class NewProjectViewModel : INotifyPropertyChanged
{
	public event PropertyChangedEventHandler PropertyChanged;

	private string _projectName = "Hello";

	public string ProjectName
	{
		get => _projectName;
		set
		{
			if (_projectName != value)
			{
				_projectName = value;
				OnPropertyChanged();
			}
		}
	}

	[NotifyPropertyChangedInvocator]
	protected virtual void OnPropertyChanged([CallerMemberName] string propertyName = null)
	{
		PropertyChanged?.Invoke(this, new PropertyChangedEventArgs(propertyName));
	}
}
We only have one property for the project name. If you look at the DataTemplate above, you can see, that the text box of the dialog is bound to the property of the view model.
And well that is all. The user clicks the button, we create the view model and the dialog opens. Any data is stored in the view model and if the user clicks ok, we can access the view model and process the data.
Kann ich den DialogHost nur mit CodeBehind aufrufen, als MessegeBox Ersatz
Sagen wir mal so, es gibt keinen einfachen MessageBox-Ersatz den man einfach aufrufen kann. Du musst mindestens das Template selbst bauen, dann kannst Du das als MessageBox-Ersatz verwenden.
Thx, I was using to show the dialog, Now i just create instance from ‚dialog.xaml‘ and put it in ‚dialoghost.show(instance,’rootdialog‘), and in this way i can separate design files of dialog from mainwindow.