The common navigator framework is one of the more complex things in Eclipse RCP. This article describes how to get started with the common navigator framework (CNF). So its just the basic stuff to get started and play around more on your own.
Enough chitchat, lets get started.
Creating the view
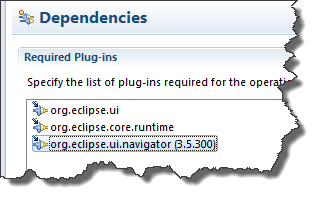
The first step is to create a demo application where you can put the CNF view. Use the RCP sample application with a view. After you created the demo project, add the org.eclipse.ui.navigator plugin to the manifest.
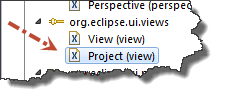
The next step is to add the view to the project by adding it to the org.eclipse.ui.views extension point.
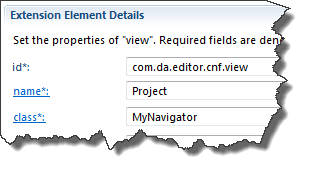
Enter the ID, a name and create a new class, subclassing the CommonNavigator class. In the example this class is named MyNavigator.
After thats done, add the view to the perspective, either by plugin.xml or in code.
Data classes
To show something in the tree, create some data classes: The first is our node we want to show. Also create a new bean class, named ParentNode with a "name" attribute.
After that, create a class named NavigatorRoot. This will serve as root node in the navigator. The root does not appear in the view itself. The class must implement the IAdaptable interface. To achieve that easily, just extend the PlatformObject class.
After that, add the following method to the NavigatorRoot class:
public Set<ParentNode> getParentNodes() {
    ParentNode node = new ParentNode();
    node.setName("Hello World");

    ParentNode node2 = new ParentNode();
    node2.setName("Hallo Welt");

    Set<ParentNode> list = new HashSet<ParentNode>();
    list.add(node);
    list.add(node2);
    return list;
}
This just creates and returns two nodes, which should show up in the navigator later.
The last step is to add the data to the MyNavigator class we created before:
@Override
protected Object getInitialInput() {
    return new NavigatorRoot();
}
Usually you would not statically set the input like in the example, but thats just an example to get it working.
Plugin.xml
Now there are some things to do in the plugin.xml file. The first thing is to add an org.eclipse.ui.navigator.navigatorContent extension point.

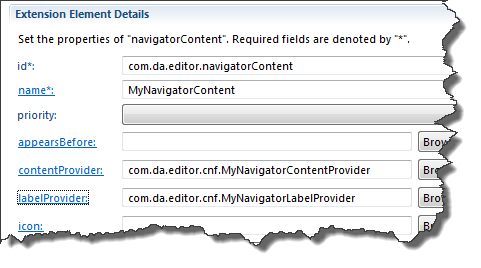
Enter an ID and a name and create a contentProvider and labelProvider for the extension point, by clicking on the links in the plugin.xml editor.
The label and content providers need some basic coding now. The content provider takes a NavigatorRoot object as input and should return an array ouf our ParentNode objects. The label provider takes the ParentNode as input and return its name property (see here for code).
In the next step, define the triggerPoints which define when the content should appear. Add a triggerPoints to the navigatorContent extension point we created before. When done add a instanceof element and enter the name of the NavigatorRoot class. The result should look like that:

In the last step, add an org.eclipse.ui.navigator.viewer extension point:
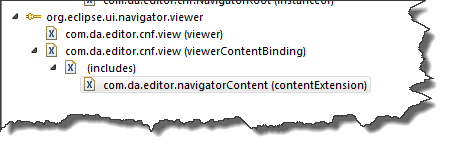
The extension point registers the view as the navigator view and binds the content to it. First create the viewer element, then the viewerContentBinding. Enter the view id here again. Add an includes element, which well, includes the navigatorContent as contentExtension. In the pattern field, enter the id of the navigatorContent we created above.
Launching the application
Once all is done and the application is launched, you should now see the content in the navigator tree:
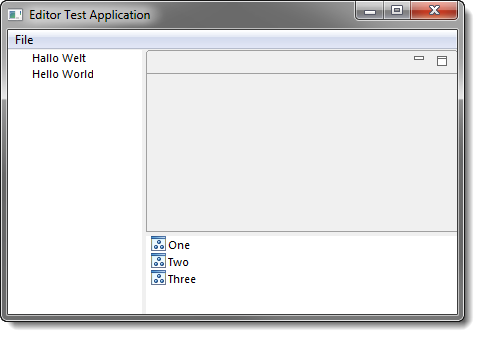
Since a lot of steps are required, especially in the plugin.xml, its most likely that the content will not show up. In that case check your code and the xml files for typos.
Well thats it. As you can see its a lot of work to get even that basic example working. In my personal opinion: think before using the CNF framework and only use it when you really need all the functionality.
Code
The code for the example can be found on GitHub.
