Note: I put the example project in a ZIP file, you can use that to have a look to the actual code, Download.
Start
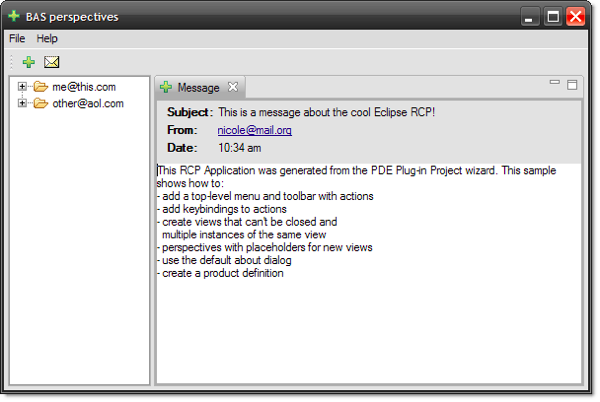
In the first step, we create a sample plugin project (Mail project):
Make the perspective bar visible
This needs to be done in the ApplicationWorkbenchWindowAdvisor.java class, in the preWindowOpen method:
IWorkbenchWindowConfigurer configurer = getWindowConfigurer();
configurer.setShowPerspectiveBar(true);

Create another plugin with perspective
We create another plugin project in the workspace, select "No" for "Rich Client Application" (no template in the next step):

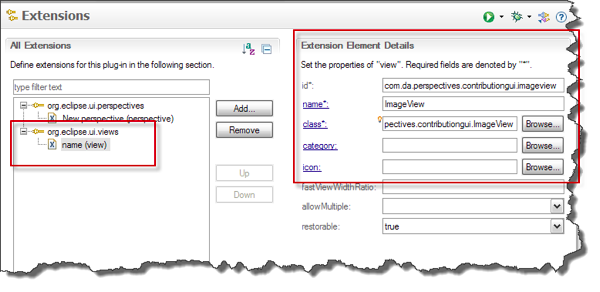
After the project is created, open the "plugin.xml" file of the new plugin project. We create a new "org.eclipse.ui.perspectives" extension point:
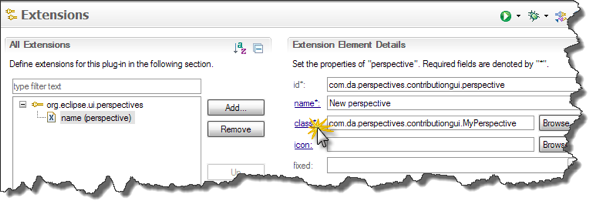
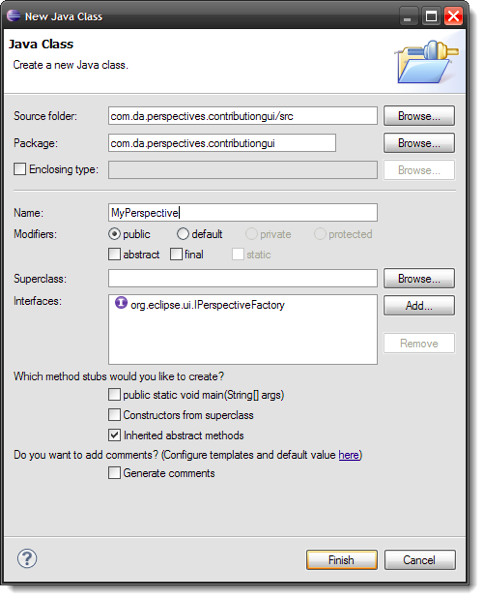
To create the perspective class, we click on the "class" link and create the class:
In our main projects "plugin.xml" add our new plugin project as dependency:

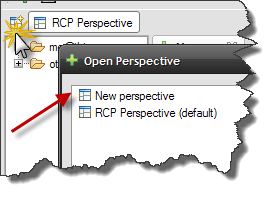
If we switch to this perspective, the window will become empty. We want an view appear in this perspective. In the example project, we create an "ImageView" and define the view in the "plugin.xml":
After that, we have to add the code which defines our perspective:
@Override
public void createInitialLayout(IPageLayout layout) {
  String editorArea = layout.getEditorArea();
  layout.setEditorAreaVisible(false);

  layout.addStandaloneView(ImageView.ID,  false, IPageLayout.TOP, 1, editorArea);
}
Contribute to an existing perspective
OK, different example: We now want to contribute our ImageView to an existing perspective. For that, we add to our contribution project an "perpectiveExtensions" extension point:
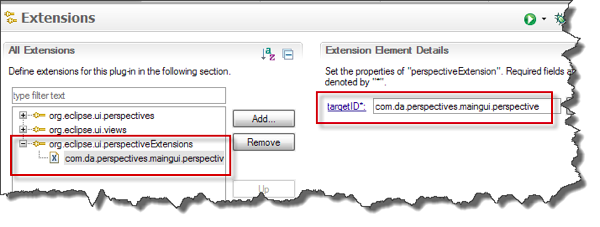
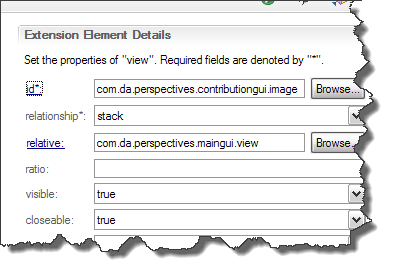
As "targetID" enter the ID of our main perspective in the "main.gui" project. Now we add a view ot our perpective extension. Right click -> New -> view:
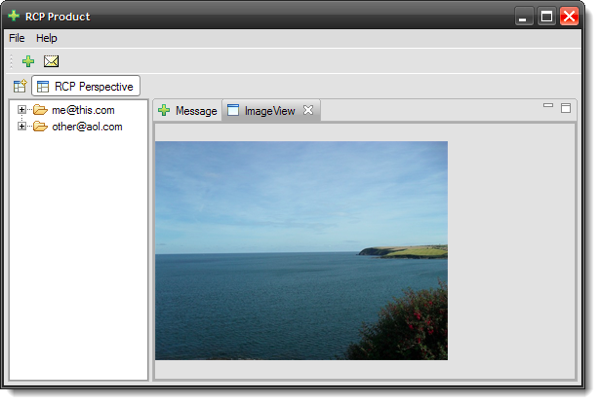
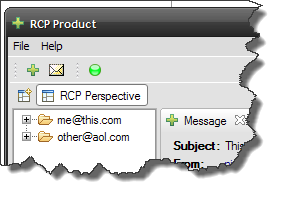
When the application starts, the ImageViewer will appear next to the message view:
Contribute to the toolbar
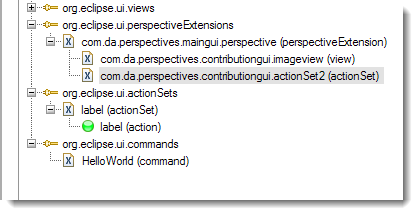
Now we want, that our contribution plugin also contributes a toolbar and menu items to our main application. For that, we have to define an "org.eclipse.ui.actionSets" extension point. Now we have to add the action set to our perspectiveExtension.
The "plugin.xml" extension points should now look something like this:
If it does not show up, make sure you entered a correct "toolbarPath" in the definition of your actionSet action:
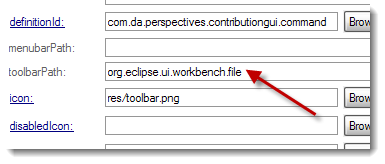
If everything is right, the new icon should appear in the toolbar of our main application.
Remove an existing item from the toolbar
If we switch to our new perspective, the image viewer, we are able to open new message views via toolbar and the menu. However, we do not want this. So we need to get rid of the menu items and toolbar items. The perspectiveExtension allows us to hide items, too. To do this, we add another perspectiveExtension for our perspective for the image view:

Now we add "hiddenMenuItems" and "hiddenToolBarItems":

Basically we just enter the IDs of the commands here. If we switch now to our perspective, the toolbar items defined should be invisible.